WDFW Approves razor clam tides: April 12th- April 18th Tides Bottom Fishing opens March 8th
Shucking Oysters
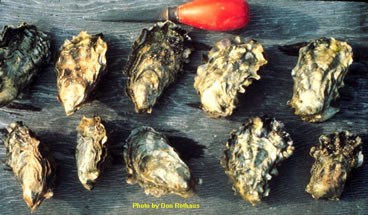 Pacific Oyster
Shucking oysters on the beach. All oysters taken by sport harvesters on public tidelands must be shucked (opened) on the beach, and the shells left on the same tideland and tide height where they were taken. To find out why, click here.
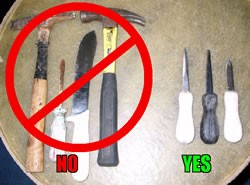 Recommended shucking tools
To shuck oysters, we recommend you use a good-quality oyster knife (one with a sturdy blade that won't bend easily) and a pair of garden-type gloves to protect your hands from cuts and abrasions. We don't recommend using screwdrivers or household knives. You'll also need a container with a cover to hold the oyster meats and their "liquor." Each harvester must have his or her own separate container.
We don't recommend young children shucking oysters, it's just too easy for them to cut themselves. Adults with a valid Shellfish License may shuck a child's daily limit of oysters, so long as the child participates in some way in the gathering of his or her limit.
Every shucker develops an individual style, and there is no single "correct" way to open oysters. Here are two popular techniques to get you started.
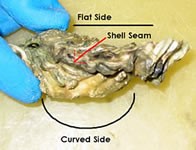 Curve Side & Flat Side Curve Side & Flat Side |
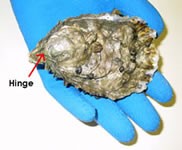 Hinge Side Hinge Side |
|
The curved and flat side of an oyster |
Location of the hinge on an oyster |
Shucking Oysters Side-Entry Method
|
1. Position the oyster cupped side down, with the hinge facing you (if you're right-handed, Figure 1). If you are left-handed, position the oyster cupped side down, with the hinge facing away from you . You can hold the oyster in your hand, but we prefer to hold it down on a hard, stable surface (a board, a bucket, a rock, another oyster). This makes it less likely that a slip of the knife will cut your hand. |
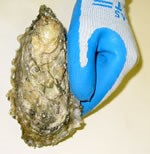 Figure 1 Figure 1 |
|
2. Look for a tiny gap between the two shells (Figure 2) in the upper right-hand corner of the oyster (lower left-hand corner if you are left-handed). Insert the knife tip between the two shells at about the "2 o'clock" position, if you are right-handed. This is the approximate position of the adductor muscle inside the shell, shown here with a red circle (Figure 3). (For left-handers, it will be about the "8 o'clock" position). You may have to "drill" slightly with the knife tip to get it to penetrate between the two shells. If the edge of the shells is heavily fluted, you may need to chip off the fluted edge near the point of insertion with the blunt end of the oyster knife before inserting the tip. |
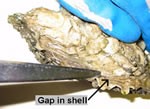 Figure 2 Figure 2Figure 2 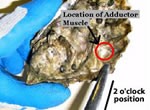 Figure 3 Figure 3 |
|
3. Keep the knife blade positioned as shown (that is, flat and parallel to the edge of the shells). Keep the hand supporting the oyster away from the blade's path if it were to slip forward (Figure 4). |
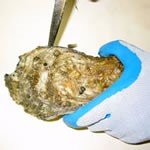 Figure 4 Figure 4 |
|
4. Once you have the tip of the knife inserted between the two shells, your goal is to gently push the blade further into the oyster and move it back and forth so as to sever the adductor muscle (Figure 5). Be sure to keep the blade pressed up against the inner top surface of the upper oyster shell, otherwise you'll risk cutting the oyster meat itself. |
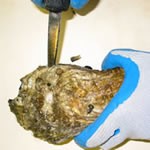 Figure 5 Figure 5 |
|
5. Move the blade back and forth until the top shell "gives" a little; this tells you that the adductor muscle has been severed at the top shell. Now you can gently pry the top shell away from the bottom shell with the knife blade. (Figure 6). Don't pull the shells apart completely, however, or you may pull off some of the oyster tissue still adhering to the top shell. With the shells just slightly apart, use the knife blade to gently scrape any remaining oyster tissue off the inner top surface of the shell. |
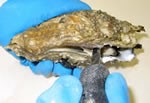 Figure 6 Figure 6 |
6. Now you can pull the top shell completely off (Figure 7). Notice the position of the adductor muscle "scar" on the inside of the top shell (Figure 8).
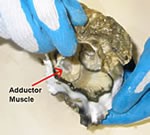 Figure 7 Figure 7 |
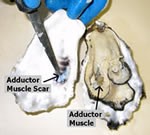 Figure 8 Figure 8 |
|
7. Now move the knife blade underneath the oyster meat and cut the adductor muscle where it is attached to the bottom shell (Figure 9). |
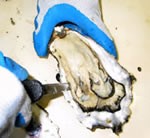 Figure 9 Figure 9 |
|
8. Now that the adductor muscle has been severed on both the top and bottom shell, you can simply tip the bottom shell and let the oyster slip into your container, along with the oyster "liquor" which collected in the cupped lower shell (Figure 10). |
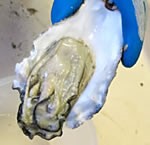 Figure 10 Figure 10 |
Shucking Oysters Hinge-Entry Method
|
1. Position the oyster cupped side down, with the hinge facing you. Insert the tip of the oyster knife between the two shells where they are joined at the hinge. Use a twisting motion to gently pry the shells slightly apart (Figure 11). |
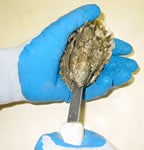 Figure 11 Figure 11 |
|
2. Move the blade forward along the "roof" of the top shell and sever the adductor muscle where it joins the top shell. That muscle will be located at approximately the "2 o'clock" position as shown in the photo. When the muscle has been severed, the top shell will "give" a little (Figure 12). |
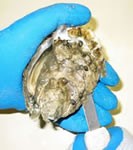 Figure 12 Figure 12 |
|
3. Follow Steps 3, 4 and 5 above in theSide-Entry Shucking Method (Figure 13). |
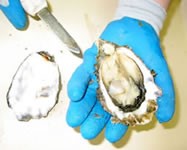 Figure 13 Figure 13 |
When shucking oysters, don't worry if shell fragments, sand, or other debris falls into your container. You can shake most of the debris off in the oyster liquor when you get ready to prepare the oysters for eating. Some people wash their oysters off in either salt or fresh water. Personally, we prefer not to wash them off in anything but their own "liquor" in order to preserve all the rich natural oyster flavor. Keep your oyster container as cool as possible until you're back in your kitchen. Storing your oyster container in a cooler immediately after shucking is ideal. Shucking oysters that are attached to rocks and/or other oysters takes a bit more skill, as does shucking very large oysters (it's somewhat more difficult to find the adductor muscle on larger oysters, and prying at the hinge can take more effort, too). Be sure to occasionally sharpen the tip of your oyster knife with a stone or grinder, especially if you use the side-entry technique.
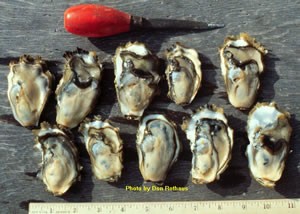
Shucking oysters will seem difficult at first, but with a little practice, you'll find that you can cleanly shuck a limit of oysters very quickly. If speed is your goal, consider watching the West Coast's best shuckers who compete annually at OysterFest, held every October in Shelton, Washington. The world's fastest shuckers compete every fall at the International Oyster Festival in Galway, Ireland, where winners typically open 30 Atlantic oysters in less than three minutes!
 Webcam Westport, Washington